Yesterday was my last day of Christmas camp (will blog more on camp soon). After our holiday Music at the Mall event this Saturday, I will officially be on break! Looking forward to getting some stuff off my to do list and taking a break.
I’m really excited how well the gifts I made for my students turned out that I wanted to share. They were easy and very affordable! (Which are two important criteria’s for me)
While I was working on plugging in words on Wordle a teacher had posted on Facebook about Tagxedo. I got so excited that there were music themed options and immediately changed my plans.
Here is what my students received…
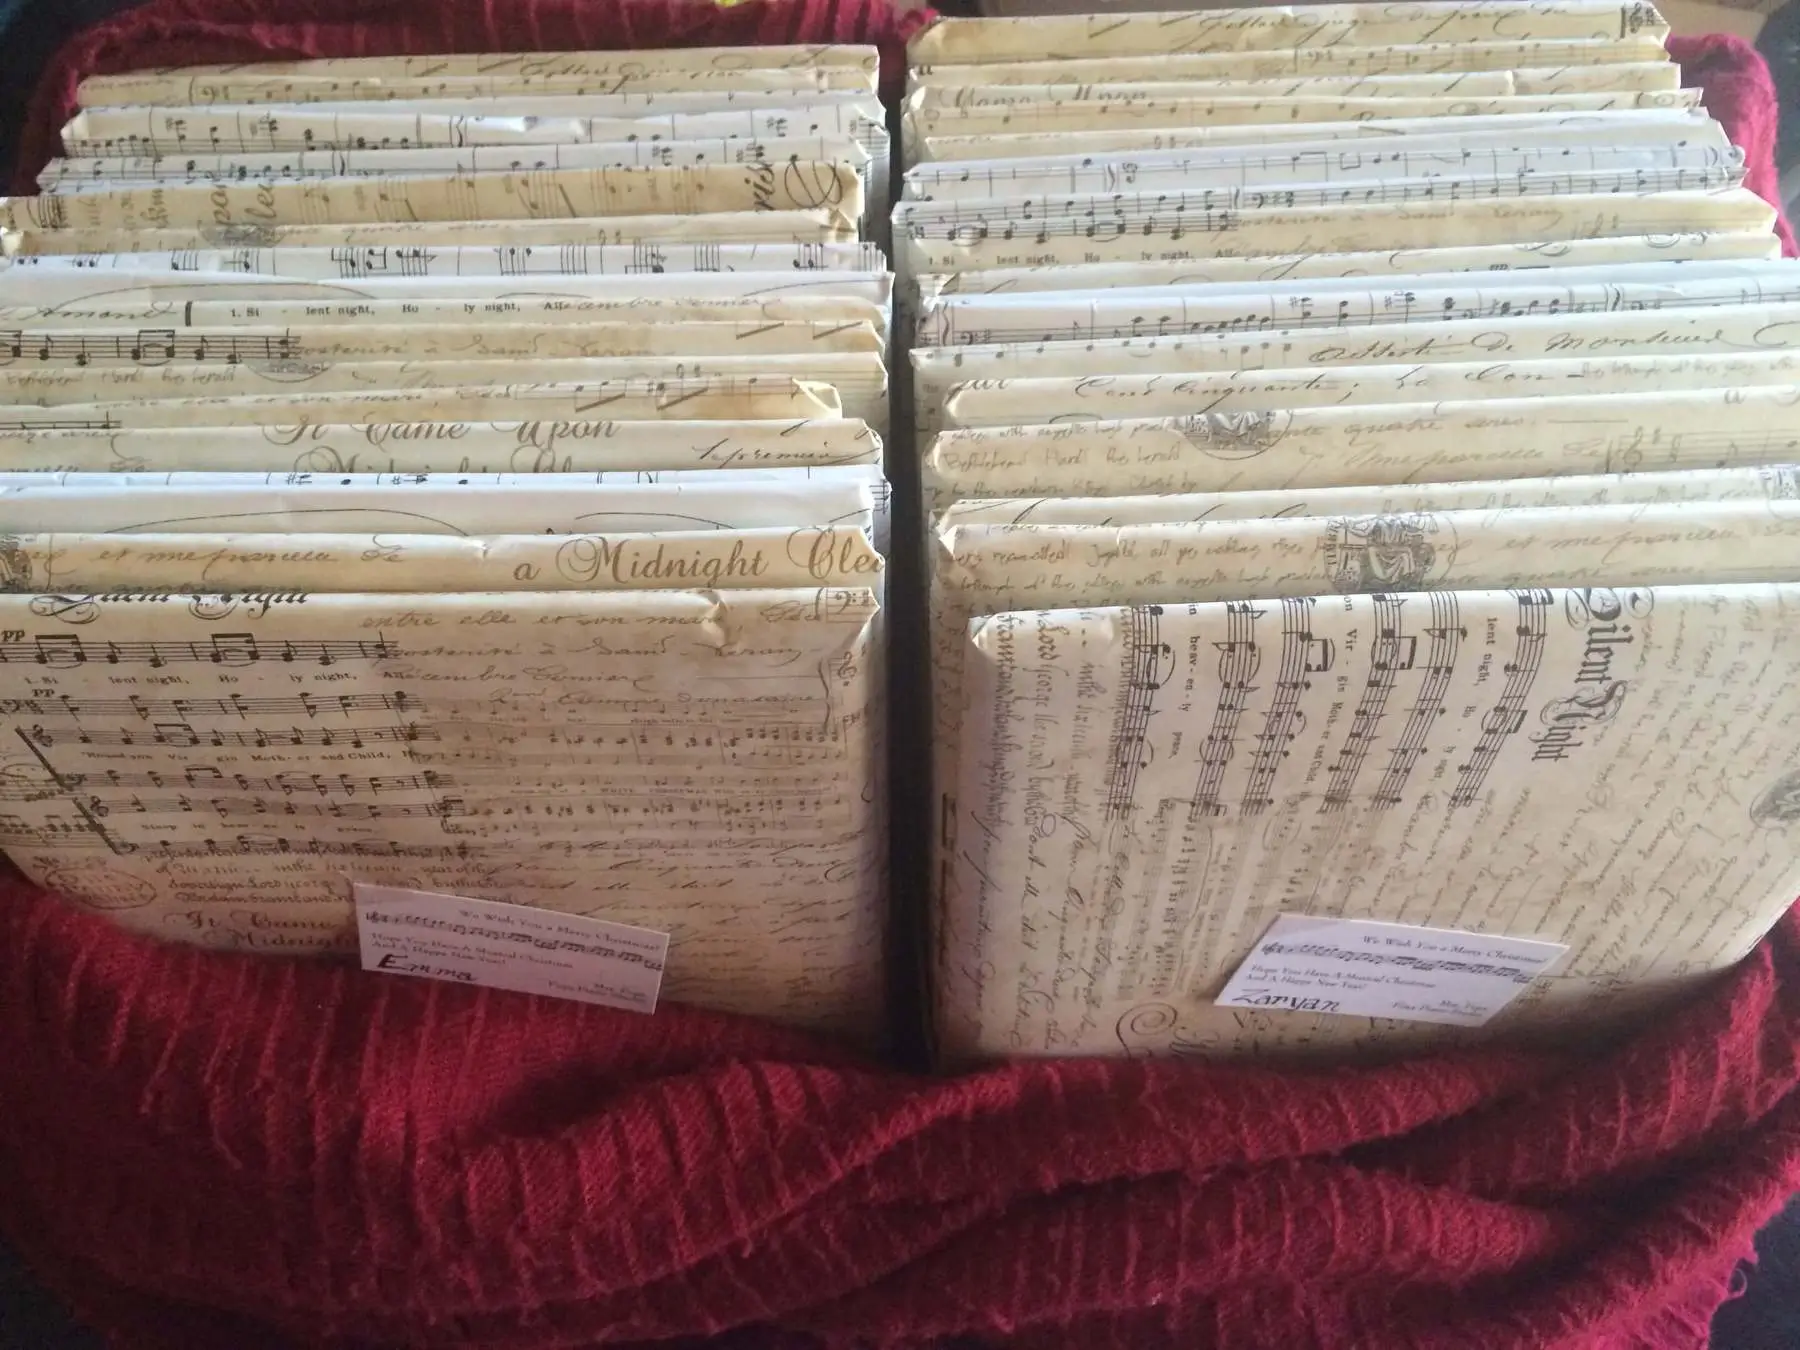
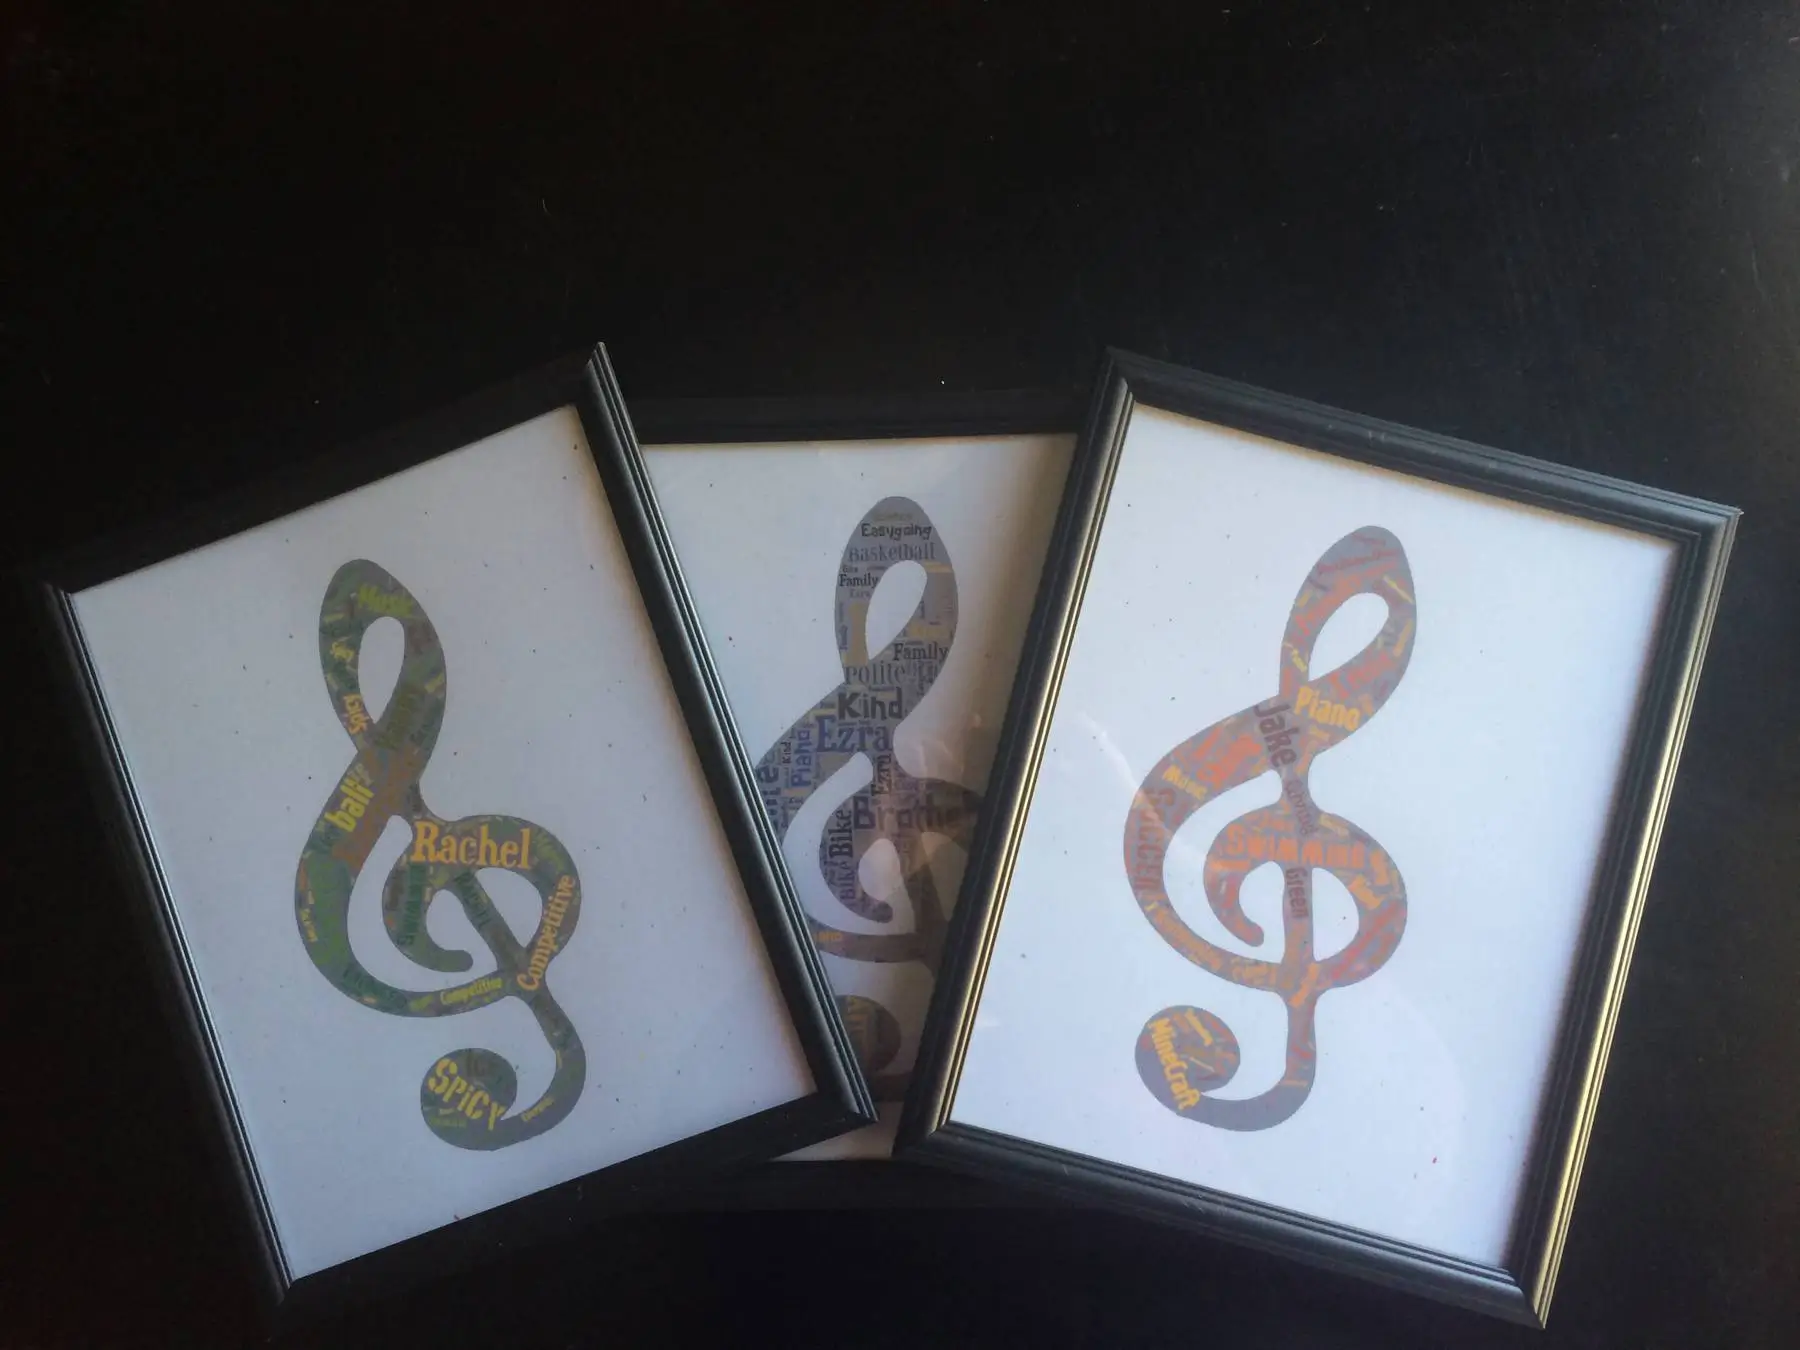 You will want to click on the picture so you can see them enlarged. I had emailed parents asking for 10-15 words that described their child (what they liked, personalities, etc…), I added in a few more and then plugged them into Tagxedo. Chose a color theme that fell into their favorite color. Printed them out on card stock, put them in a frame (dollar store) and wrapped them in Christmas music themed wrapping paper that I had found. (Total gift cost including wrapping paper- approx. $1.50 a student.) For my adults I plugged in the names of the pieces they learned over the year so it was a visual representation of what they accomplished (so important for adults to see).
Here is a text I received from one Mom… “Oh my goodness, the gift you made R is amazing!! She loves it and so do I! Thank you so much for everything you do!”
There are times when I have thought about not doing a gift for my students because I hear teachers say that they are the one’s that should be receiving gifts, not giving. And I totally get that. But I just can’t help it. I enjoy giving and it is just a small way of letting them know how much I care for them. When I get texts like the one above, it makes that extra time and effort worth it.


Perfect gift!
Jennifer, these are so awesome …. And you are so creative. I sometimes think I am computer graphic challenged. Lucky students.
Thanks Saundra, but Tagxedo made it easy. 😉
Awesome idea, Jennifer! Thanks for sharing as I may use it sometime in the future – creative, simple and inexpensive!
Super idea, Jennifer! I may do those next year.
So cool! I’m totally going to use this to create a studio t-shirt with everyone’s names. Love it!
Funny you should say that Libby, because I was thinking of doing a similar idea for my Keyboard Festival design this year! 🙂
These are wonderful! I don’t give my students gifts at birthdays or Christmas (feeling guilty now).. But, I think these may make a nice birthday gift, and I have been thinking about starting to do that. Do you also give birthday gifts? Thank you for such inspiring posts and ideas! Have a joyous holiday season!
Blessings, Jana Jaudon
Jana’s Piano Studio (615) 847-3944
________________________________
Hi Jana, don’t feel guilty. 😉 And no, I do not do b-day gifts for my students…
Ooh! This is fantastic! I think I’ll do this next Christmas!
Wow – they turned out beautifully!
How did you get it to put a colored background only behind the treble clef? When I did it, the background is behind the whole page.
Hi Julie, it was a learning experience for sure. First, make sure the color scheme you chose doesn’t have a colored background. Many of them do. Make sure it’s a white background. Then I wanted to have the “grey” to make the treble clef pop versus just the white so all you need to do is click on the word “shape” and it will turn it grey versus white. Hope that helps.
THANKS!!!!! I’ve used this for Gifts for my students also! Love it!
Hi Jennifer, I have a question of how do you save the image into. I’m guessing that I will want to fit the cardstock into 4 by 6 frame. I click on Save, then Image, but not sure which number, 125KP JPEG, etc. I tried a few but still don’t show up like the ones you have. Would you share this detail? Thank you!
Hi Alice,
I cheated if I remember correctly and just made a screen shot of each one. At the time I don’t think they had all those options. I think that will probably be the easiest route for you.
Just thought I would make a comment on steps on how to make these because it could get a little confusing at first. From the main page, first click “start now”, then to find a different shape like treble clef on the left side click on the right arrow next to the word “shape”. You can also change the colors themes, fonts, etc… Then click the “load” button and you type in the custom words under “enter text”, then click submit. Then what I did at this point is I clicked on Full Zoom and just took a screen shot of it and then printed it from there.
These are fabulous!! How/where did you find the treble clef for the words to fit into? I went on Tagxedo, didn’t find one there.
Barbara, from the main page, first click “start now”, then to find a different shape like treble clef on the left side click on the right arrow next to the word “shape”. You can also change the colors themes, fonts, etc…